Operating System (Only 64 bit editions are supported by SharePoint 2010)
For Windows Server 2008 with SP2, see FIX: A hotfix that provides a method to support the token authentication without transport security or message encryption in WCF is available for the .NET Framework 3.5 SP1 (http://go.microsoft.com/fwlink/?LinkID=160770).
For Windows Server 2008 R2, see FIX: A hotfix that provides a method to support the token authentication without transport security or message encryption in WCF is available for the .NET Framework 3.5 SP1
SQL Server
The 64-bit edition of Microsoft SQL Server 2005 with Service Pack 3 (SP3) with Cumulative update package 3 for SQL Server 2005 Service Pack 3 (http://go.microsoft.com/fwlink/?LinkId=165748).
The 64-bit edition of Microsoft SQL Server 2008 with Service Pack 1 (SP1) and Cumulative Update 2 installed with Cumulative update package 2 for SQL Server 2008 Service Pack 1 (http://go.microsoft.com/fwlink/?LinkId=165962). This cumulative update consists of two parts; ensure that you download both files. When you install Microsoft SQL Server 2008 SP1 on Windows Server 2008 R2, you might receive a compatibility warning. You can disregard this warning and continue with your installation
.NET Framework 3.5 SP1
Once you have installed the above mentioned softwares you can go ahead and start the installation of you SharePoint Server.
Step1 : Log in to the machine using a user who has Administrator rights. Open the folder where you have downloaded SharePoint Server 2010 (Beta) and double click on the OfficeServer.exe.
Step 2: Once you get the SharePoint 2010 installation screen Click on Install Software Pre-Requisites.
Note : Make sure that you have internet access because after clicking on Install Software Pre-Requisites the installer will install the pre-requisites from the Web.
Step 3: When the SharePoint Product and Technologies 2010 Preparation Wizard opens review the softwares that it will install and click Next.
Step 4: On the next Screen Accept the License Agreement and click next. The installation of pre Requisites will start and if everything goes well you will see the Installation Complete page. This means that we can now go ahead and install SharePoint.
Step 5: Restart your machine Open the folder where you downloaded SharePoint 2010 Beta and click on OfficeServer.exe and when the welcome screen opens click on “Install SharePoint Server”. Then on the next screen enter the Product Key and click Continue.
Step 6: On the next Screen Accept the License Agreement and Click Continue
Step 7: On the “Choose the Installation” page click on Server Farm.
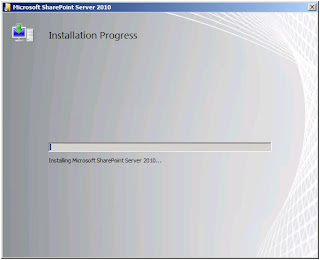
Step 8: On the “Server Type” page Select Complete and Click install now. The installation will start and when it is complete you will get the Run Configuration Wizard Page.
Step 9: On the Run Configuration Wizard page click close. The SharePoint Configuration Wizard should start.
Step 10: On the Configuration Wizard Screen Click Next. A pop up window will open and warn you that some services will be restarted. Click on Yes.
Step 11: On the ”Connect to Server Farm” Screen Select the “Create new Server Farm” option and Click Next.
Step 12: On the “Specify Database Settings” Screen type in the Database Server name and the Username Password of the database access account (This user should be the local admin and should also have the DbOwner and SecurityAdmin role in the SQL Server). (The Database name will be pre-populated) Then Click Next
Step 13: On the “Specify Farm Security Settings” screen type in the Passphrase. Note: This passphrase will have to be entered again if you are adding additional servers to this farm. Then click Next.
Step 14: On the “Configure SharePoint Central Administration Web Application” screen specify the port number on which you want to host your web application and select the Security settings (Kerberos/ NTLM) . Then click Next
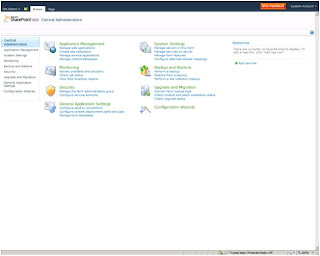
Step 15: On the “Completing the SharePoint Products Configuration Wizard” Screen review the information and click next. The wizard will start the configuration of your SharePoint Server and once done you get a “Configuration Successful” screen. Click finish and your Central Administration site will open up in Internet Explorer.
Step 16: On the “Help make SharePoint Better” page select No and click OK.
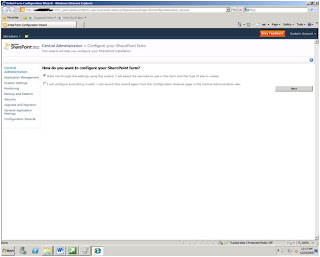
Step 17: On the “How do you want to configure your SharePoint farm page” Select “Walk me through the settings….” Option and click next.
Note: This procedure can also be done at a later point by Selecting the Configuration Wizard Option in the QuickLaunch menu of Central Admin web site.
Step 18: On the next page in the Service Account Section either select an existing managed account or create a new one by specifying the credentials (This account should be present in AD). Then click Next. Now SharePoint will create all the Service Applications for you.
Step 19: Once all the Service Applications are created you will be redirected to the Create a site collection page. It is up to you to create a site collection or Skip this Step. I chose to Skip this step J. So click on Skip.
Step 20: You will then be redirected to the Configure your Server farm page which will show all the Services that are running on the Farm, you can review them and Click on Finish. Now your farm is fully installed and configured. So go ahead and dive into the world of SharePoint 2010.


Thank you so much for sharing all the necessary steps and also providing the list of software prerequisites for installing SharePoint 2010. This post is of great help and support for all the beginners.
ReplyDeleteelectronic signature for sharepoint